

How to Photograph the Moon With Your Phone
The Moon can be the brightest thing in the photograph and still occupy only a few pixels. Understanding those two problems separately is the quickest way past the familiar white blob. Apollo 11 supplied the detailed Moon photograph used here to show what changing exposure can reveal.

Start in ordinary Photo mode. Support the phone, turn off the flash, focus on the Moon and lower the exposure before taking the picture. Use a timer, then inspect the saved photograph. If the Moon has tone but remains tiny, you have improved the exposure; magnification is the next problem. If you want a skyline as well, begin at twilight rather than trying to brighten a black foreground. NASA’s lunar photography guide illustrates both approaches with actual phone photographs.
Why the Moon becomes a white disk
There is a bright subject surrounded by a large dark field. The camera must decide how to represent both. An automatic exposure that makes the surroundings more visible can leave the lunar surface too bright to distinguish. Conversely, protecting detail on the Moon can make the ground almost black. Nikon describes this as a dynamic-range problem: the foreground and Moon may need different exposures. Nikon’s Moon photography guide
This is why “night photograph” is a misleading starting point. The illuminated Moon is a sunlit landscape. You are photographing that reflected sunlight from far away, not trying to collect the faint glow of a nebula. NASA recommends treating the bright lunar surface more like a daylight subject than a typical low-light scene. How to Photograph the Moon
Exposure clipping means different bright tones have been pushed to the same output value. Instead of retaining differences between light and dark terrain, that part of the saved picture can become uniformly white. Adobe’s explanation of tonal adjustments distinguishes those clipped highlights from tones still represented in the file. Lowering brightness afterward can make a white patch gray; it cannot reliably reconstruct surface detail that was never recorded. A raw file may retain information that its initial preview conceals, but that is not a promise that any overexposure can be rescued.
There is another possible failure: the disk may be correctly exposed but too small to contain recognizable terrain. Darkening that image further will not help. Diagnose the problem before changing another setting.

Try framing and exposure
How much Moon is in the frame?
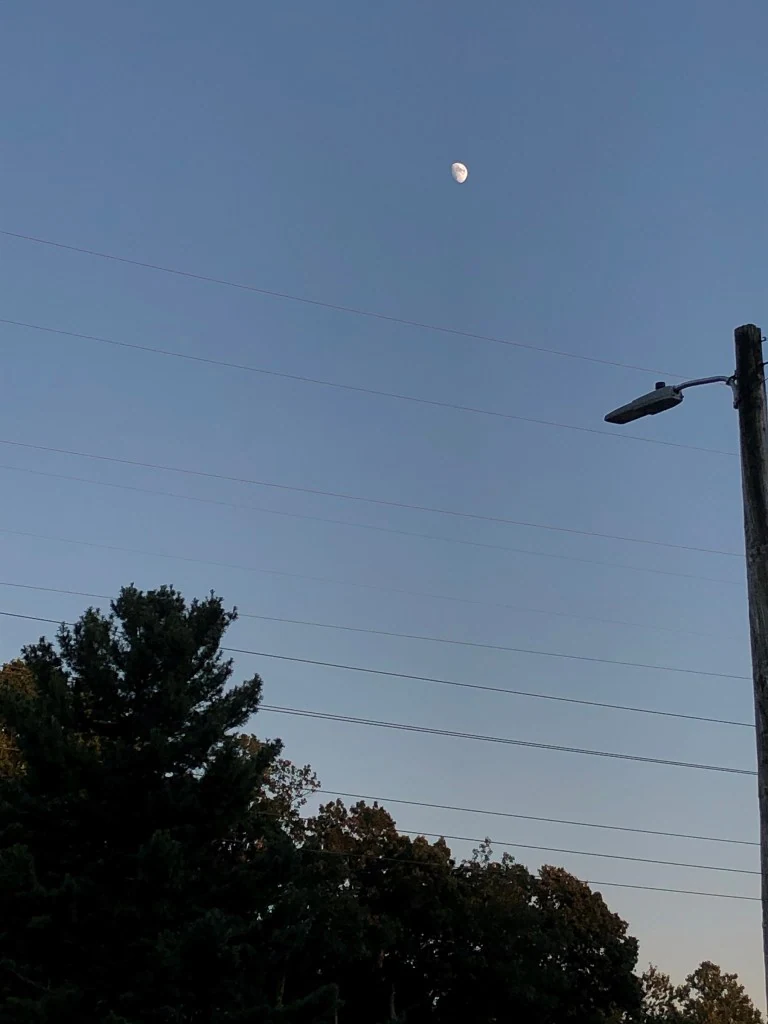
Find the small bright patch above the streetlight. Move into the photograph until you see what that patch is made of.
This is a crop of the same published phone image all the way in. No sharpening, AI detail, or switch to a telescope.
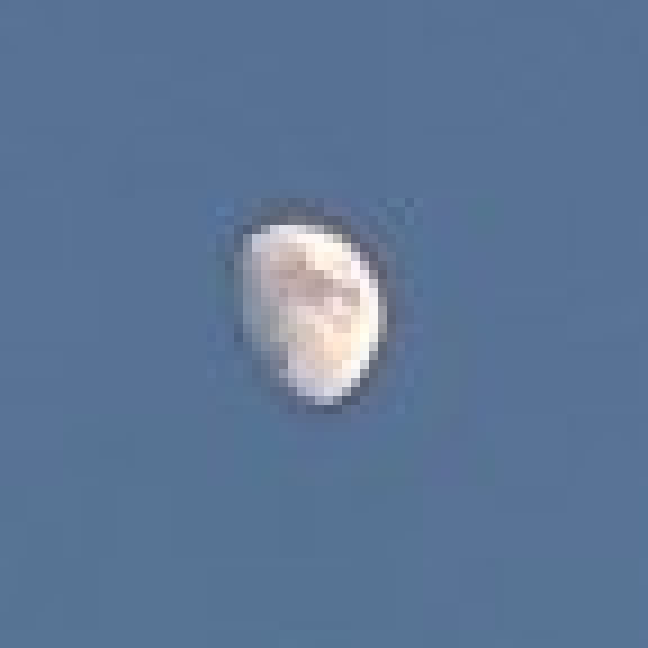
The magnified 72-pixel crop at left shows the few recorded pixels. Enlarging them does not reveal craters.
What the white disc hides
Here the source has plenty of detail. Change the exposure before the simulated picture is recorded. Watch the dark circular basins appear first.
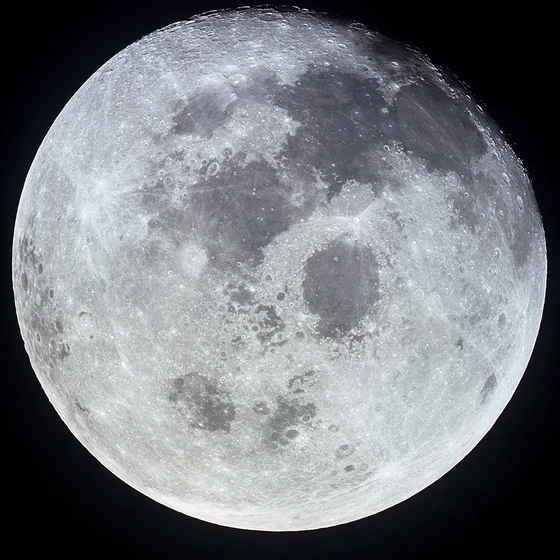
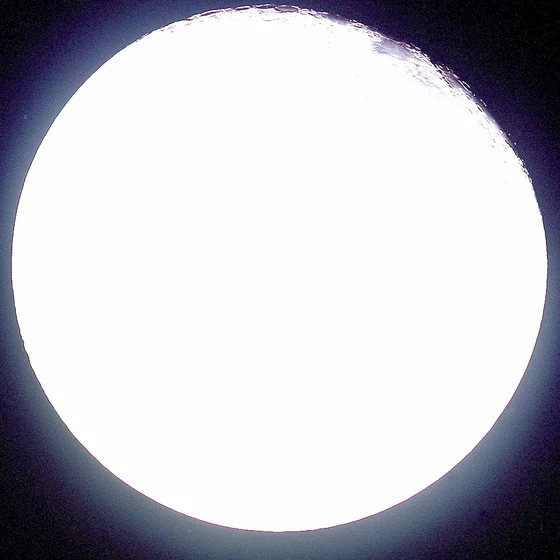
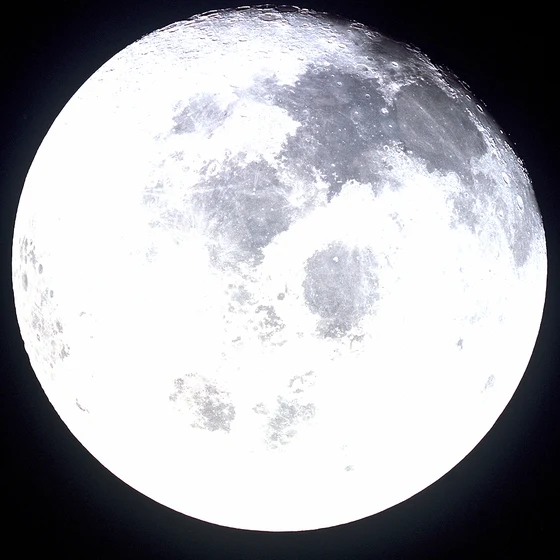
Set exposure before taking the photograph
On an iPhone, open Camera in Photo mode and tap the Moon to set the focus area. Drag the exposure control beside it downward. For a sequence, touch and hold the focus area until AE/AF Lock appears; tapping the screen again unlocks it. Apple also documents an Exposure control among the camera tools. Use the screen controls if your model has no separate Camera Control button. Apple’s current camera-tools guide
Do not hunt for a universally correct negative number. Adjust until the saved image gives you a defined lunar face, rather than a white patch. The useful amount depends on the scene, selected camera and processing. If the Moon is too small to tap confidently, stabilize the framing first. Check that an accidental tap on the foreground has not changed the result.
On recent Samsung Galaxy software, the documented route is Camera, then the quick-controls menu, then Exposure. Move the control toward a darker result and take a test frame. Samsung warns that availability varies by model and software, and that this exposure setting resets when Camera closes. Samsung’s exposure instructions
That is a Galaxy example, not an Android-wide menu path. On another Android camera, look for its own brightness, exposure compensation or EV control and consult the model’s guide if it is absent. Do not confuse a brightness adjustment in the photo editor with capture exposure. One changes a photograph you already have; the other changes what you are about to record.
Some Galaxy models also offer Pro controls for ISO and exposure, but Samsung explicitly says modes differ between devices. You do not need to learn every manual control for this first test. Keep the setup simple enough to understand which change improved the image. Samsung’s camera modes
Three photographs that isolate the problem
Try this sequence without moving the phone or changing zoom. It is a suggested experiment, not a set of photographs we claim to have taken.
For the first frame, leave exposure automatic. Include the Moon and a recognizable part of the scene, such as a roofline. This is your reference, even if it looks poor. Look at the saved image: is the Moon a solid patch, a smeared streak, or a small disk with some variation? Those failures call for different changes.
For the second frame, reduce exposure and use the same composition. Look for a sharper-looking boundary and tonal differences across the face. If the roof becomes a silhouette, that is useful evidence: the settings now favor the Moon. If everything simply becomes darker while the lunar patch stays featureless, make another modest reduction and compare. Do not judge success by the overall brightness of the scene.
For the third frame, keep the darker setting but put the phone on a secure support and use a short timer. Compare several attempts. If the edge becomes more consistently defined, movement was contributing to the problem. If the disk remains small but clean, stop troubleshooting exposure and move to the magnification test below. If it remains soft, revisit focus before applying heavy sharpening.
The purpose is not to select a “winning” preset. It is to find whether the next improvement comes from less exposure, steadier capture or more useful image scale. Keep the reference frames until you have compared them at the same size.
Zoom changes framing, not exposure
A phone’s zoom label does not tell the whole story. NASA distinguishes genuine optical magnification from digital zoom that crops the image. Enlarging a crop can make the Moon easier to examine without adding newly captured surface information. A telescope at the phone’s eyepiece changes the optical setup again; photographs made that way should not be presented as bare-phone results. NASA’s lunar photography guide
Make a second comparison using the cameras available on your phone. Take one frame at your normal view and one at the longer view, adjusting exposure again if necessary. Crop the normal image so the Moon appears the same size in both. Compare the edge and dark markings, not simply how much of the screen the disk fills. This is a practical comparison of your phone’s results, not a laboratory resolution measurement.
Keep two separate questions in mind: does the larger version help the composition, and does it contain more convincing detail? A closer framing can be useful even when it does not resolve another crater. But a high zoom number alone is not a reason to discard the wider photograph.
The edge of the file
Same street, same Moon. This square is just 72 pixels wide in the published file. The jagged cream-coloured shape is recorded information. A crater drawn inside it would not be.
Choose twilight for a landscape, side light for terrain
For a photograph about a place, plan the Moon’s position relative to the foreground. NASA photographer Bill Ingalls describes scouting viewpoints and using terrestrial objects to give a lunar image context. Check moonrise or moonset for your location, then visit the viewpoint early enough to discover the blocked sightline, locked gate or awkward road before the moment arrives. NASA’s planning advice
For a photograph about the lunar surface, phase changes the lighting. Away from full Moon, shadows near the boundary between day and night make relief easier to distinguish. Dark patches across the disk are the maria, ancient volcanic plains; they are different from the shadows outlining individual craters. NASA’s Moon viewing guide explains what those features represent. Whether you can resolve them depends on the image scale, not just choosing the right night.
The November 24, 2026 full supermoon is a convenient occasion to practice a landscape composition. It is not a deadline, nor the only useful phase. NASA lists the event in its November skywatching guide. Check your local rise time rather than treating the full-Moon date as an appointment shared by every horizon.
A small Moon can stay small.
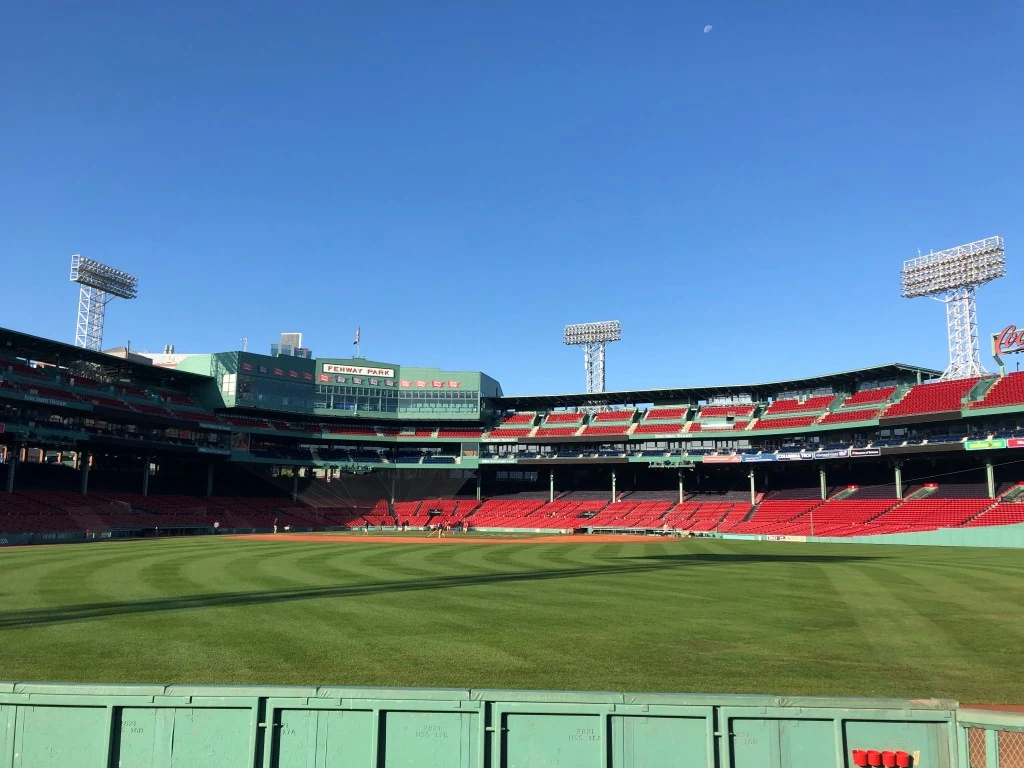
What the real examples demonstrate
NASA’s examples include a twilight phone photograph by Tracy Vogel and a Fenway Park scene by Molly Wasser. These are their photographs, not Spacian tests or a before-and-after sequence. The two images offer different goals: exposing the Moon and including it in a place. Source photographs and credits
A separate NASA smartphone article shows that support need not mean an elaborate rig: one of its lunar photographs was made using an iPhone 6s resting on a car’s roof rack. The same article recommends steadiness, focus control and a timer to reduce movement from touching the shutter. Its broader low-light advice should not be mistaken for an instruction to use a long exposure on the bright lunar face. NASA Night Sky Network
For your next attempt, choose one improvement you can recognize in the saved file: a disk with tone, a steadier edge, or a foreground that gives the image a sense of place. Leave the other variables alone until you know whether that change worked. You will have a photograph worth comparing, and a reason for what to try next.
Sources and credits
NASA lunar photography guide and real phone photographs · Editorial policy and corrections